Solution Recipes are tutorials to achieve specific objectives in Klaviyo. They can also help you master Klaviyo, learn new third-party technologies, and come up with creative ideas. They are written mainly for developers & technically-advanced users.
Note: We do our best to make sure any code and API references are accurate and current when this is published, but you might need to update code and it’s always a best practice to leverage ourlatest API versions. If you have questions, feel free to hop over to ourDeveloper Community.
How to send existing Google ecommerce event data to Klaviyo through Google Tag Manager (GTM)
If you are already sending ecommerce events to Google Tag Manager, you can send this same data to Klaviyo and expedite your integration process
Moderate
Prerequisite
Familiarity with GTM, and having an existing Data Layer with populated ecommerce events according to Google’s documentation.
Introduction
Connecting GTM to Klaviyo is a great way to make the most of the data you already have — you’ve got event data in the Data Layer, so why not use it elsewhere? Any data from GTM can be sent to Klaviyo, even user behavior like scroll depth or element clicks.
In this Solution Recipe, I am going to be looking at sending the details of the begin_checkout ecommerce event from the data layer to Klaviyo in the Started Checkout metric.
Your exact configuration may be different, but the concepts and examples should give you guidance on how to use this for your particular setup.
Instructions
1. Create a Begin Checkout Trigger
You’ll need to use an existing — or create a new — trigger for this tag to fire. If a “begin checkout” trigger already exists, you can skip this step and use your existing trigger.
If you don’t have a “begin checkout” trigger, there are many ways to create one, but it may be specific to your site configuration. I’ll go over two common situations here — an Element Click Trigger and a Page Load Trigger.
Creating an Element Click Trigger
This trigger works when a customer starts checkout by clicking a specific element or button.
In this example, a customer will click a button with the ID checkout:
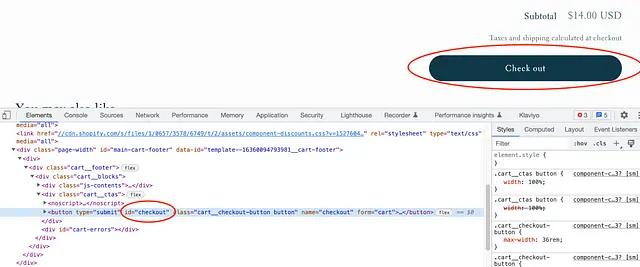
The corresponding trigger would be set up as follows:
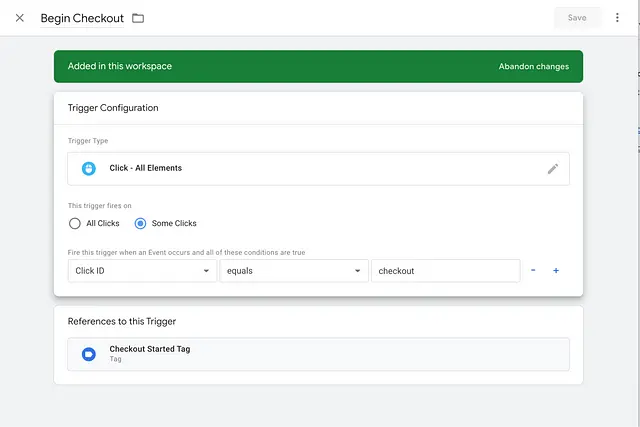
“Click ID” may not be present in the variable dropdown. To add it, choose “Choose Built-In Variable”:
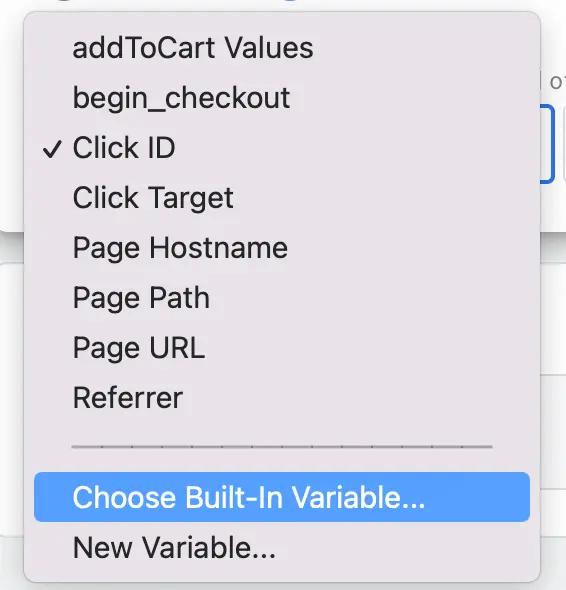
And select it from the following screen.
You can also choose different variables as click triggers. Those are outlined in more detail here.
Another common option for triggers is the “Click Element”, which allows for more specific selection of clicked elements. Using our button example above, the same element would be selected like so:
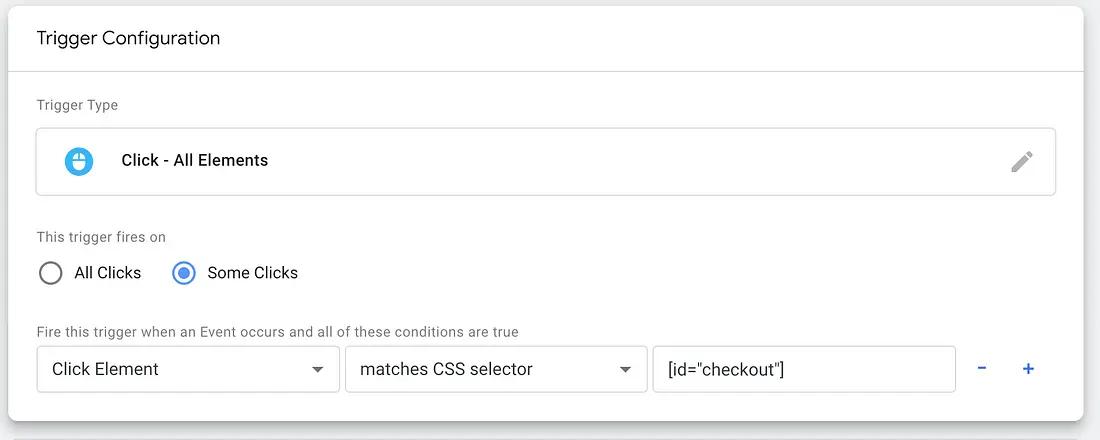
The “matches CSS selector” options follow the behavior of the Web API function document.querySelectorAll(), which has several examples and more details here.
Creating a Page Load Trigger
This trigger fires depending on the page that is loaded.
In this example, the trigger will be “Page View – Window Loaded” with “checkout” in the page path.
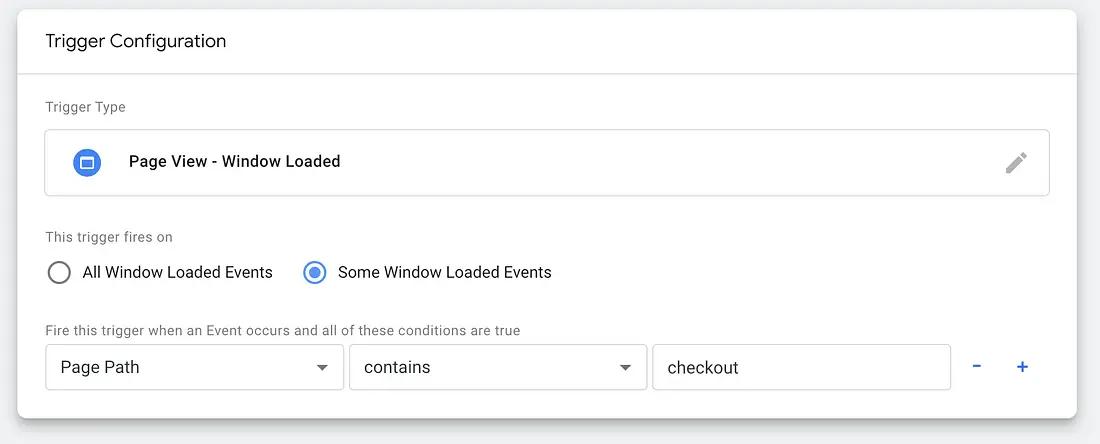
Different page view triggers — and the order in which they are fired — are outlined here. “Window Loaded” is the last trigger to be fired, and happens when the page has fully loaded, including embedded resources like images and scripts.
Keep this in mind if your tag is not firing with complete data — you may need to change the trigger to one that fires later.
2. Create Variable
Next, you need to create a variable that references the ecommerce object in the Data Layer.
If you are following the Google ecommerce measurement documentation, your Data Layer would look something like this:
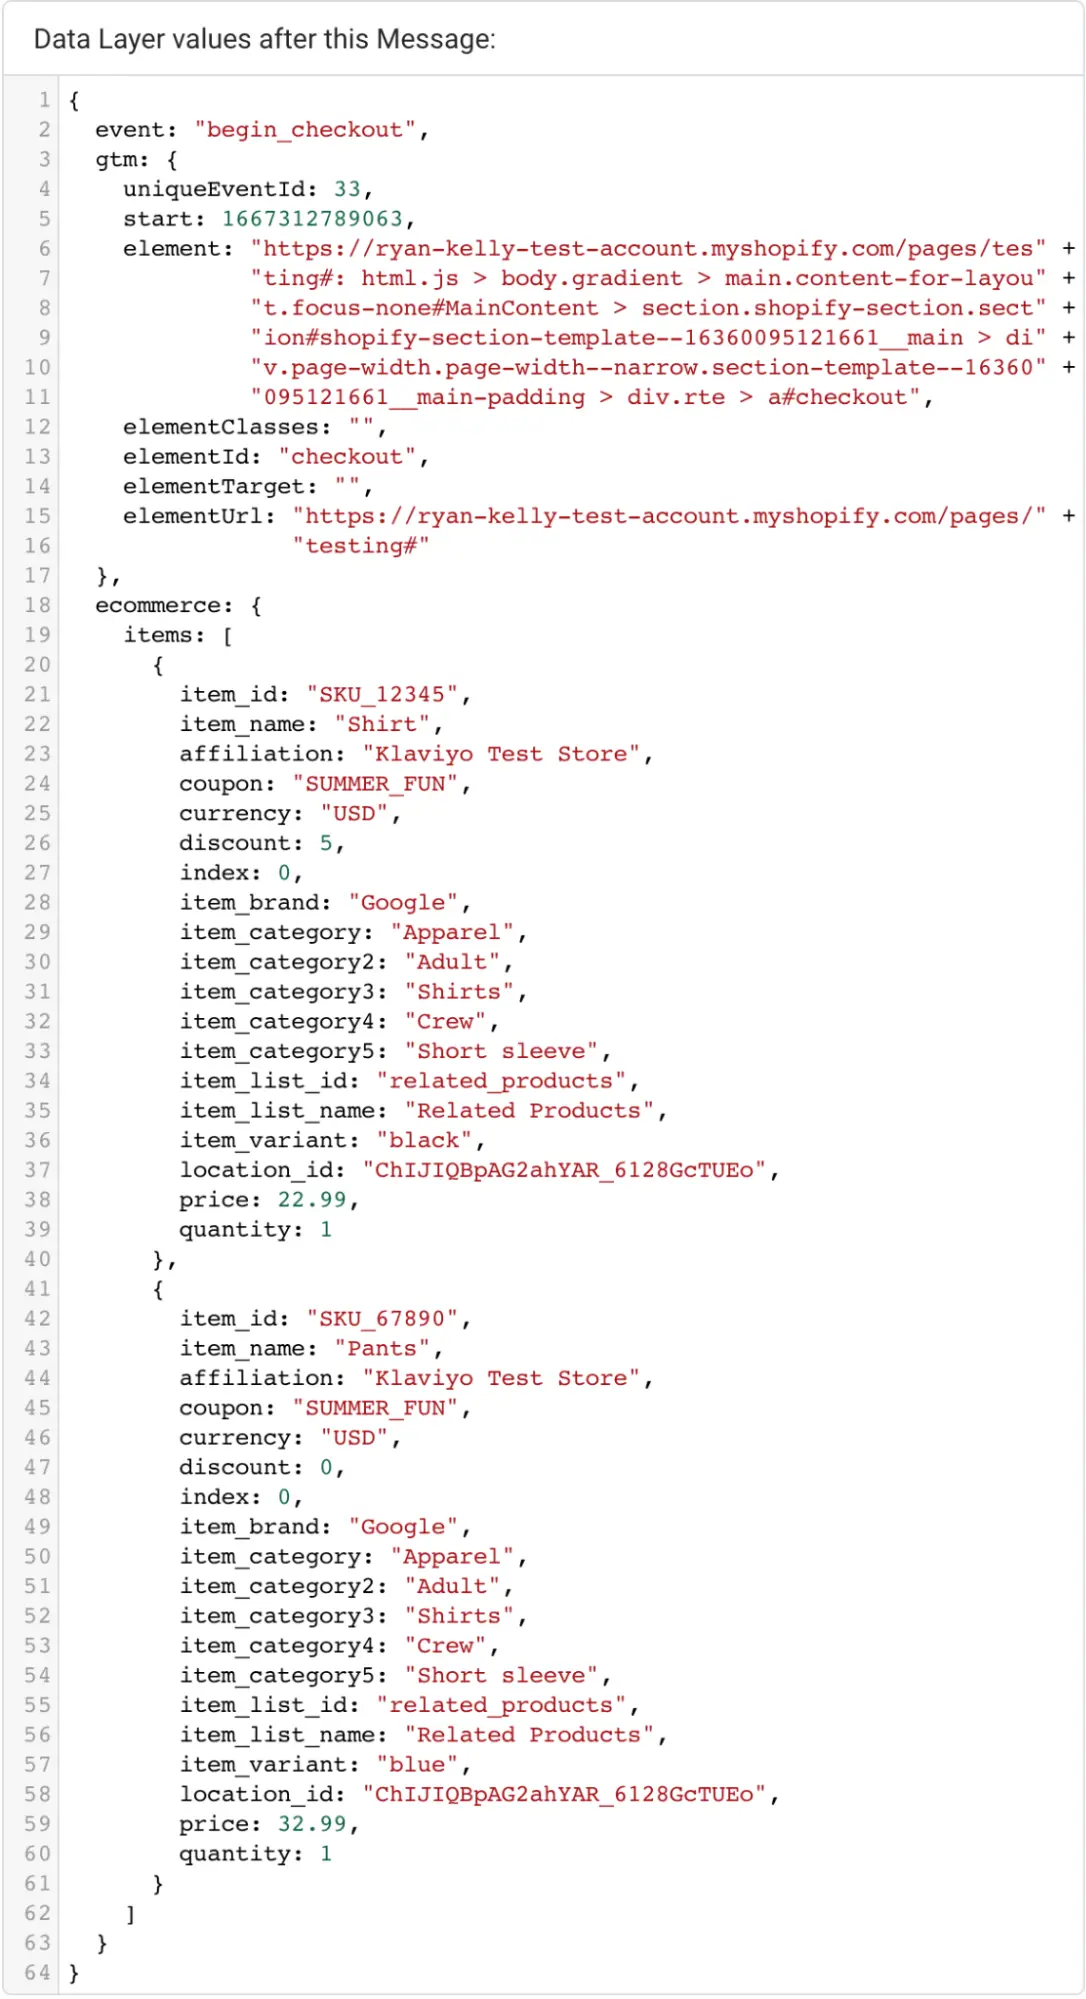
You can create a variable that references something in the Data Layer:
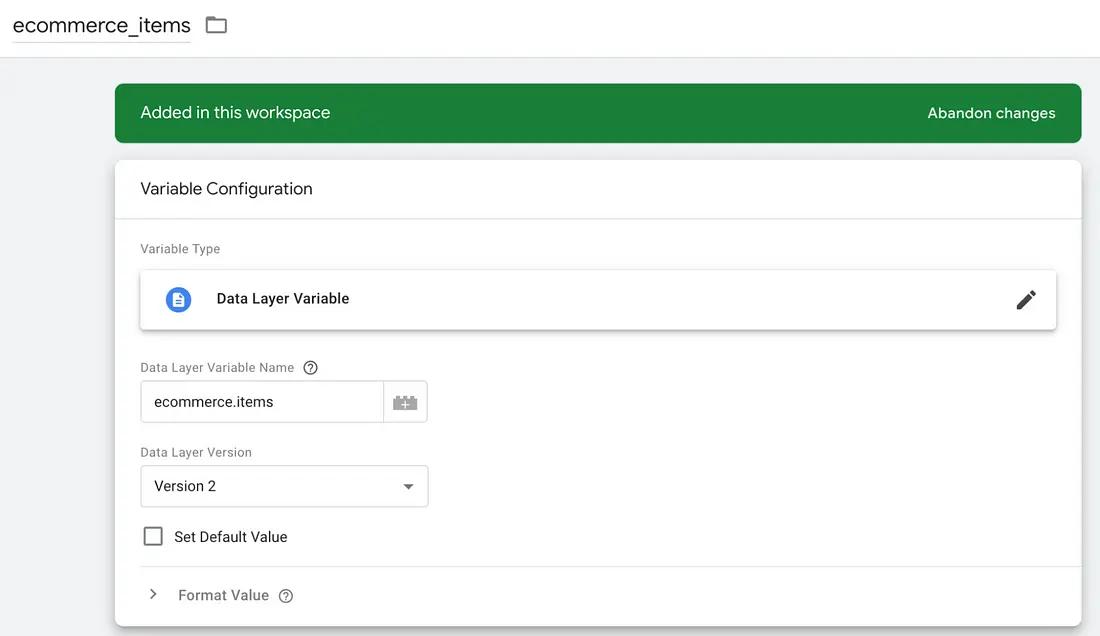
Now the variable {{ecommerce_items}} will contain the data in ecommerce.items of the Data Layer.
💡 This functionality can be really powerful, as it can allow you to pull data or details from the Data Layer and make it available in other functionality in GTM — like a function to send data to Klaviyo.
Our {{ecommerce_items}} would look like this in the Tag Assistant and in GTM:
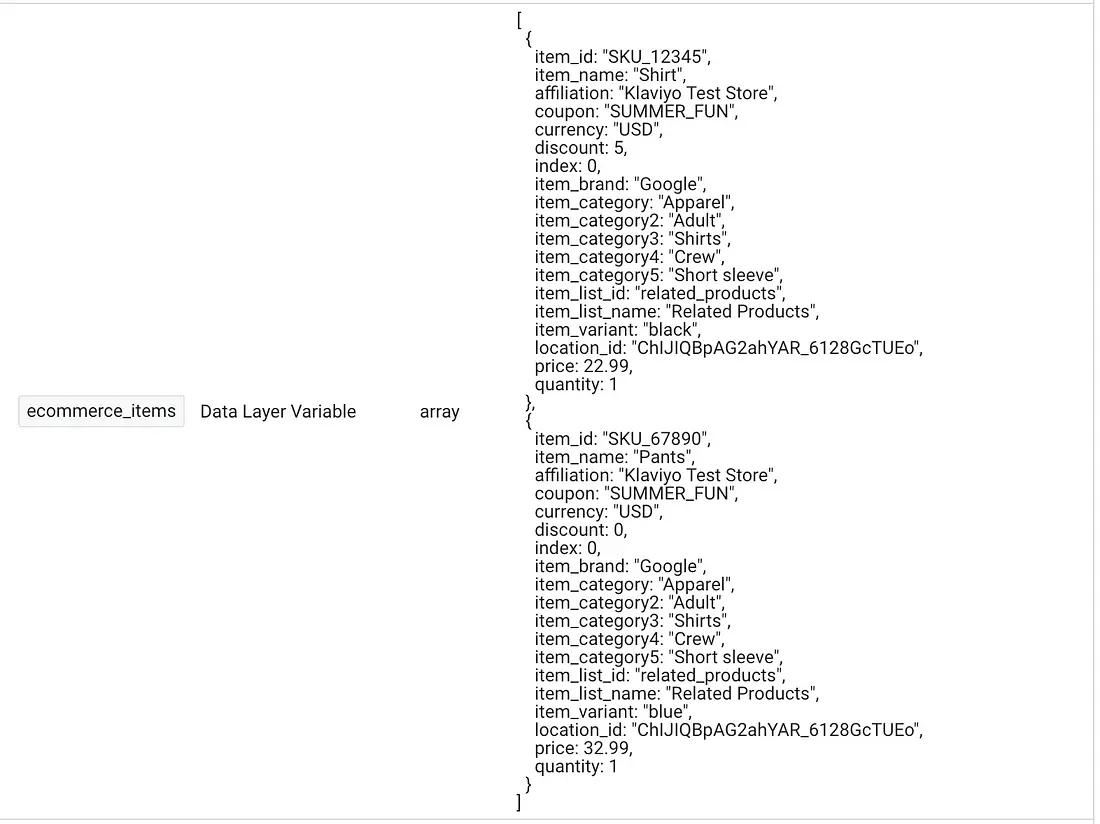
Which correctly is set to the values of the ecommerce.items array.
3. Adding $value and adjusting the structure.
$value is a special field in Klaviyo, and is required where an event has a value, an item or an order value. Event imports/API calls will not error out without this, but they will not show value in Klaviyo without it.
More on this field can be found here.
As we want to see the total $value of the begin_checkout event, we need to sum that up for each item and add it to the data we will be sending to Klaviyo.
It’s also handy to have the list of items in our checkout in a list when we send the data to Klaviyo, so it can be used in flows and elsewhere. An example of this can be seen here.
So we will make a new variable, which includes $value and a better structure for our checkout items.
var checkoutValue = 0;
var checkoutData = {};
for (var i = 0; i < {{ecommerce_items}}.length; i++){
 checkoutValue += {{ecommerce_items}}[i].price * {{ecommerce_items}}[i].quantity;
};
checkoutData.$value = parseFloat(checkoutValue.toFixed(2));
checkoutData.Items = {{ecommerce_items}};
After this change, checkoutData will look like:
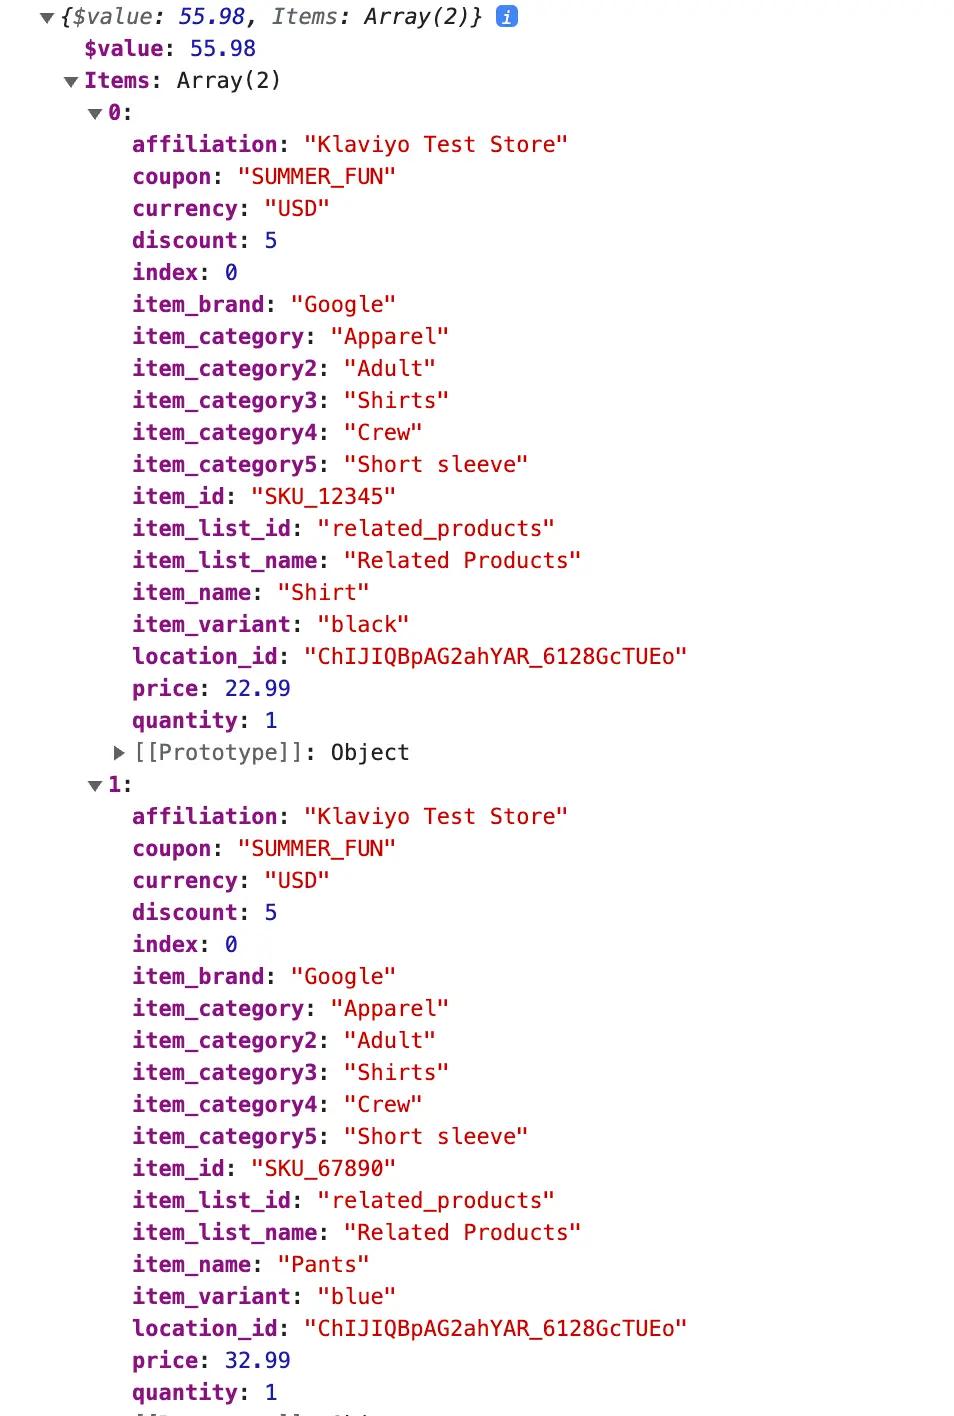
You can use the same concept to add other data, too, if you want to further amend what has been pushed into the Data Layer.
4. Tag to Send Data To Klaviyo
Finally, put it all together with the tag that will send the data to Klaviyo. This tag will be a “Custom HTML” tag and it will be triggered by the “Begin Checkout” trigger that was created previously.
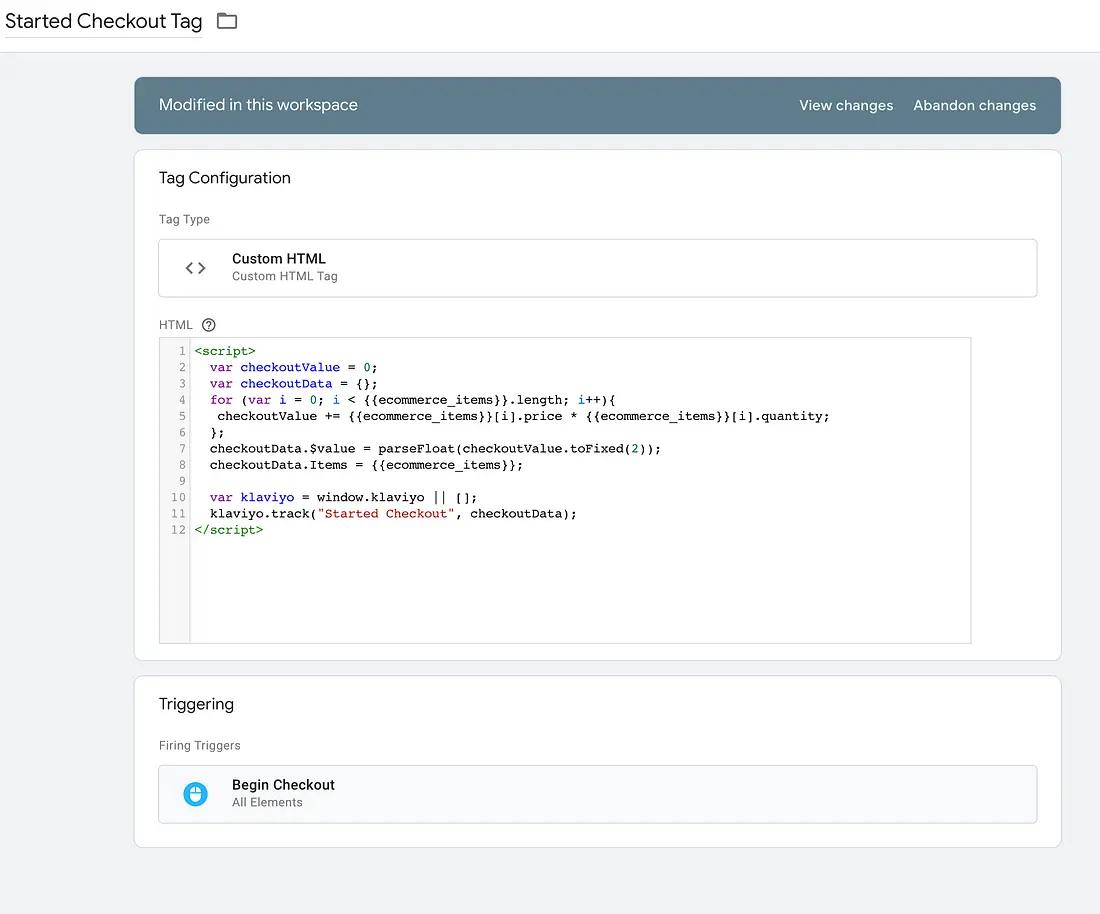
Here we have the loop to calculate $value and create checkoutData from a previous step. And additional code to send data to Klaviyo:
<script>
  var checkoutValue = 0;
  var checkoutData = {};
  for (var i = 0; i < {{ecommerce_items}}.length; i++){
   checkoutValue += {{ecommerce_items}}[i].price * {{ecommerce_items}}[i].quantity;
  };
  checkoutData.$value = parseFloat(checkoutValue.toFixed(2));
  checkoutData.Items = {{ecommerce_items}};

  var klaviyo = window.klaviyo || [];
  klaviyo.track("Started Checkout", checkoutData);
</script>
This creates a reference to the window level Klaviyo object, or a blank array if not found:
var klaviyo = window.klaviyo || [];This sends the actual track request — a Started Checkout event — with the data we defined previously.
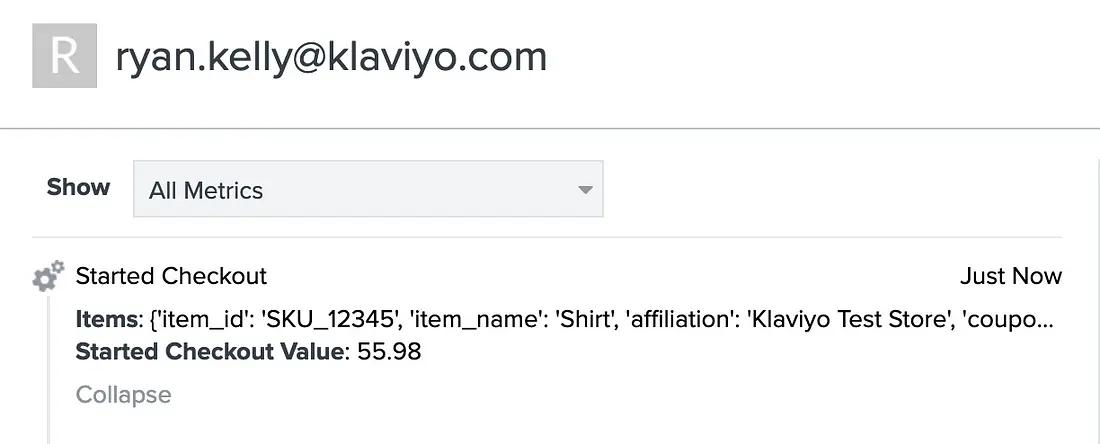
klaviyo.track(“Started Checkout”, checkout);This will then show up as an event for the user, and it can be used for flows and other functionality in Klaviyo.
Possible Issues
Like other client-side Klaviyo functionality, this only works for users who are identified by Klaviyo.
If you are using any Page Load/Page View trigger, be aware of what assets are available when in the loading of the page. If you trigger on “Page Initialization”, the Klaviyo object will not be loaded yet.
Additional Examples — Variables and Tags
Building upon what was referenced above, here are some additional examples of common ecommerce events that push to the Data Layer and can be sent to Klaviyo.
The great news is that you can reuse the {{ecommerce_items}} variable for these additional actions, as all of ecommerce events follow the same structure, and the item list is updated per interaction. So, when a customer adds to cart, the item list is cleared and updated with what they added to cart. Similar to when you view an item — it is cleared and updated with the item you viewed.
The only difference is that you will need to send different events to Klaviyo, so the tag will be different.
Viewed Product
This tag needs to be fired on a product page view, or as Google refers to it, the view_item event. As there is only one item per view_item event, we can refer to the first element directly, with {{ecommerce_items}}[0].
<script>
  {{ecommerce_items}}[0].$value = {{ecommerce_items}}[0].price;
  var klaviyo = window.klaviyo || [];
  klaviyo.track("Viewed Product", {{ecommerce_items}}[0]);
</script>
Added to Cart
This tag needs to be fired when a customer adds an item to their cart, which is Google’s add_to_cart event. As there is only one item per add_to_cart event, we can refer to the first element directly, with {{ecommerce_items}}[0].
<script>
  {{ecommerce_items}}[0].$value = {{ecommerce_items}}[0].price;
  var klaviyo = window.klaviyo || [];
  klaviyo.track("Added to Cart", {{ecommerce_items}});
 </script>
Impact
While this was focused on a specific scenario — using the begin checkout Data Layer data — the concepts apply to other data that may be present in the Data Layer.
You’ve done the hard work to build out the Data Layer, and now you can use that to enrich Klaviyo.
