Solution Recipes are tutorials to achieve specific objectives in Klaviyo. They can also help you master Klaviyo, learn new third-party technologies, and come up with creative ideas. They are written mainly for developers and technically-advanced users.
Note: We do our best to make sure any code and API references are accurate and current when this is published, but you might need to update code and it’s always a best practice to leverage ourlatest API versions. If you have questions, feel free to hop over to ourDeveloper Community.
Integrate with a third-party API such as OpenAI to generate dynamic content and import it into your Klaviyo account, to use in campaigns and messages.
Moderate
Introduction
This solution recipe will show you how to create awesome AI-generated images for your next Klaviyo campaign.
In this case, we’re a brand that sells avocados and avocado accessories, and we’re looking to create the perfect illustration for a big sale campaign.
Challenge
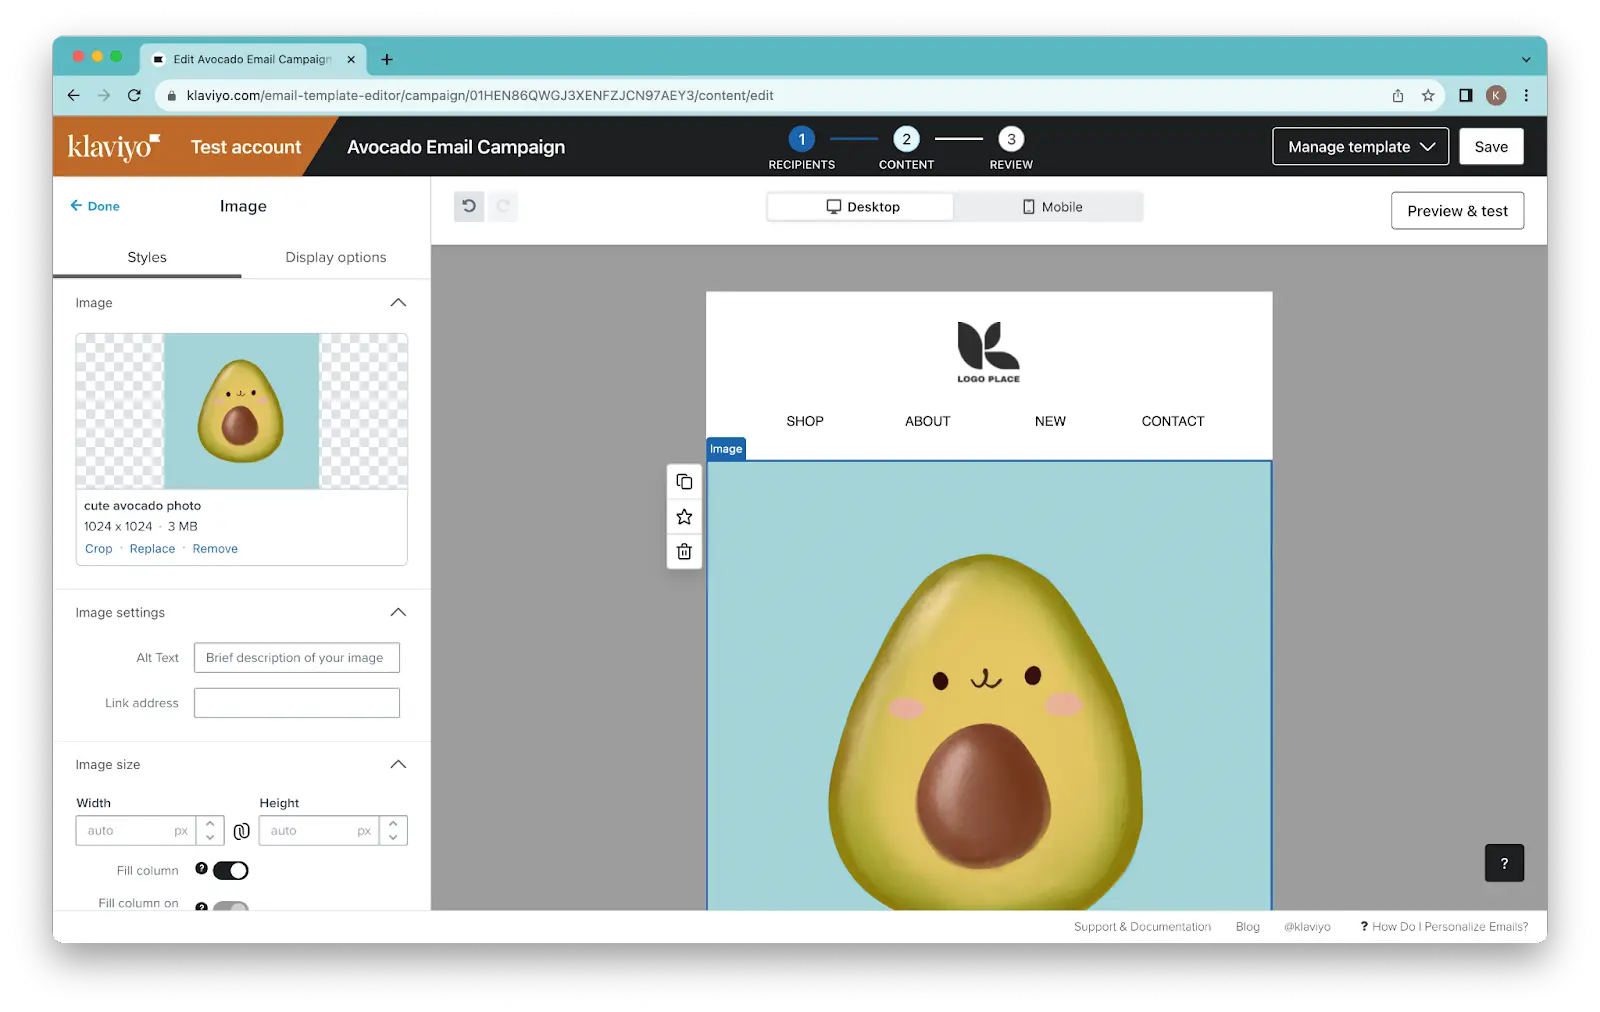
Give AI a prompt for creating the perfect image for my brand’s upcoming email campaign campaign, get that into my Klaviyo Images & Brand library, and create an email campaign using the asset.
Klaviyo recently released APIs for uploading images to your account, so this is now possible!
Note that you should check any AI-created images for brand compliance and adhere to any copyright or monetization concerns. Before you begin, we recommend consulting your legal team before using any AI service to ensure you’re in compliance with your company’s policies. It is also your responsibility to ensure that your usage of any images that OpenAI generates and which you use in Klaviyo campaigns meets the OpenAI usage policy.
Preparation
Get started with Klaviyo’s APIs
- Create a test account if you don’t have one already for experimentation purposes.
- Fork our latest Postman Collection from the Klaviyo Developers workspace, or fork the 2023-10-15 collection directly.
- Create and retrieve your private API key.
Get started with OpenAI’s Dall-E API
- Create an OpenAI account if you don’t already have one!
- They have a great API overview and a quickstart Python SDK guide.
- Create and retrieve your OpenAI API key.
- Read OpenAI’s terms and policies.
- To learn more about how OpenAI prices their Dall-E APIs, see their pricing page.
Get started with Napkin.io
If you don’t have one already, sign up for a free Napkin.io account. Napkin is a Klaviyo tool that allows you to write and run server-less functions. You can also use the code-hosting platform of your choice to run the code you will write in this recipe.
Using Dall-E APIs to generate images from a prompt
In the following example Postman request, a call is made to OpenAPI’s Create image endpoint:
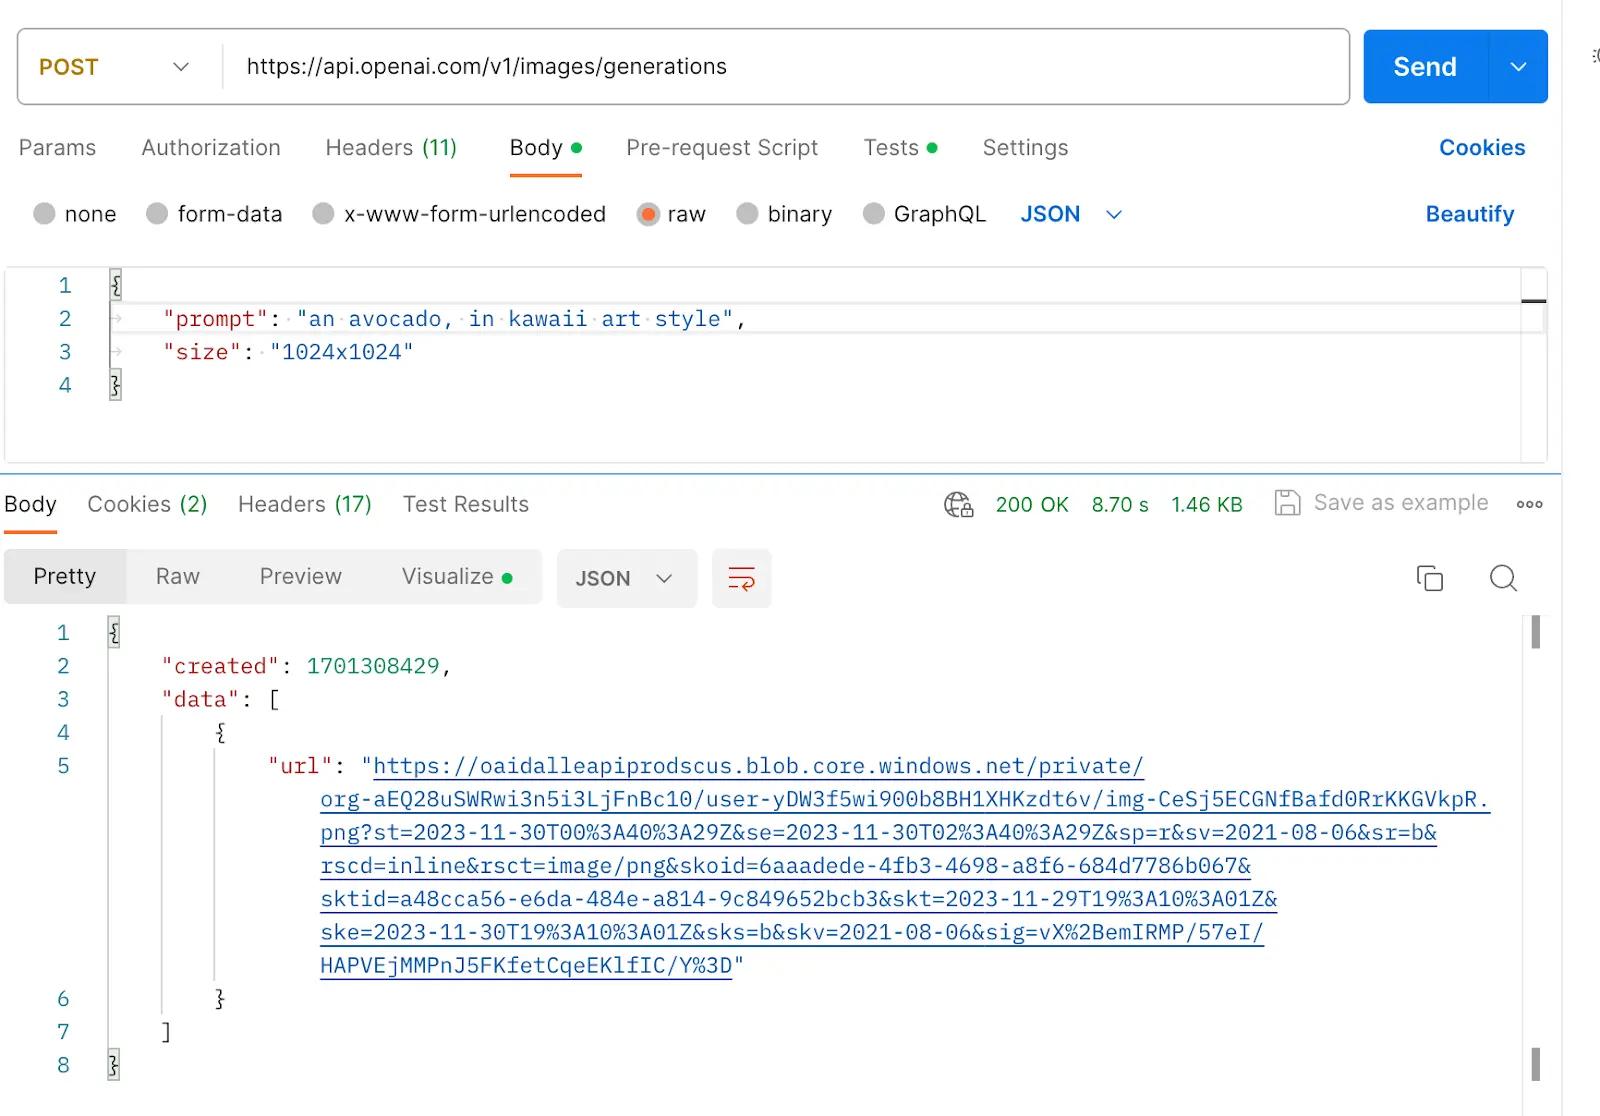
Here’s the same request using the OpenAI Python SDK:
import os
import openai

def openai_generate_images(request):
    openai.api_key = os.getenv("OPENAI_API_KEY")
    input = request.body or {}

    openai_response = openai.Image.create(
        prompt=input.get("prompt") or "an avocado, in kawaii art style",
        n=input.get("count") or 1,
        size=input.get("size") or "1024x1024"
    )

    return openai_response
Note that if you set n to a value greater than 1, you will get an image URL for each variant in the data array.
Calling the OpenAI API will return a response like the following. Note that the URLs returned by this API expire after an hour, so you’ll want to upload it to Klaviyo before this expiration.
{
  "created": 1698068491,
  "data": [
    {
      "url": "https://oaidalleapiprodscus.blob.core.windows.net/private/org-aEQ28uSWRwi3n5i3LjFnBc10/user-yDW3f5wi900b8BH1XHKzdt6v/img-CeSj5ECGNfBafd0RrKKGVkpR.png?st=2023-11-30T00%3A40%3A29Z&se=2023-11-30T02%3A40%3A29Z&sp=r&sv=2021-08-06&sr=b&rscd=inline&rsct=image/png&skoid=6aaadede-4fb3-4698-a8f6-684d7786b067&sktid=a48cca56-e6da-484e-a814-9c849652bcb3&skt=2023-11-29T19%3A10%3A01Z&ske=2023-11-30T19%3A10%3A01Z&sks=b&skv=2021-08-06&sig=vX%2BemIRMP/57eI/HAPVEjMMPnJ5FKfetCqeEKlfIC/Y%3D"
    }
  ]
}
Using Klaviyo’s APIs to upload images
Once you have created an image URL from OpenAI’s Dall-E API, you can upload that as an image asset to your Klaviyo account. Here’s what that looks like:
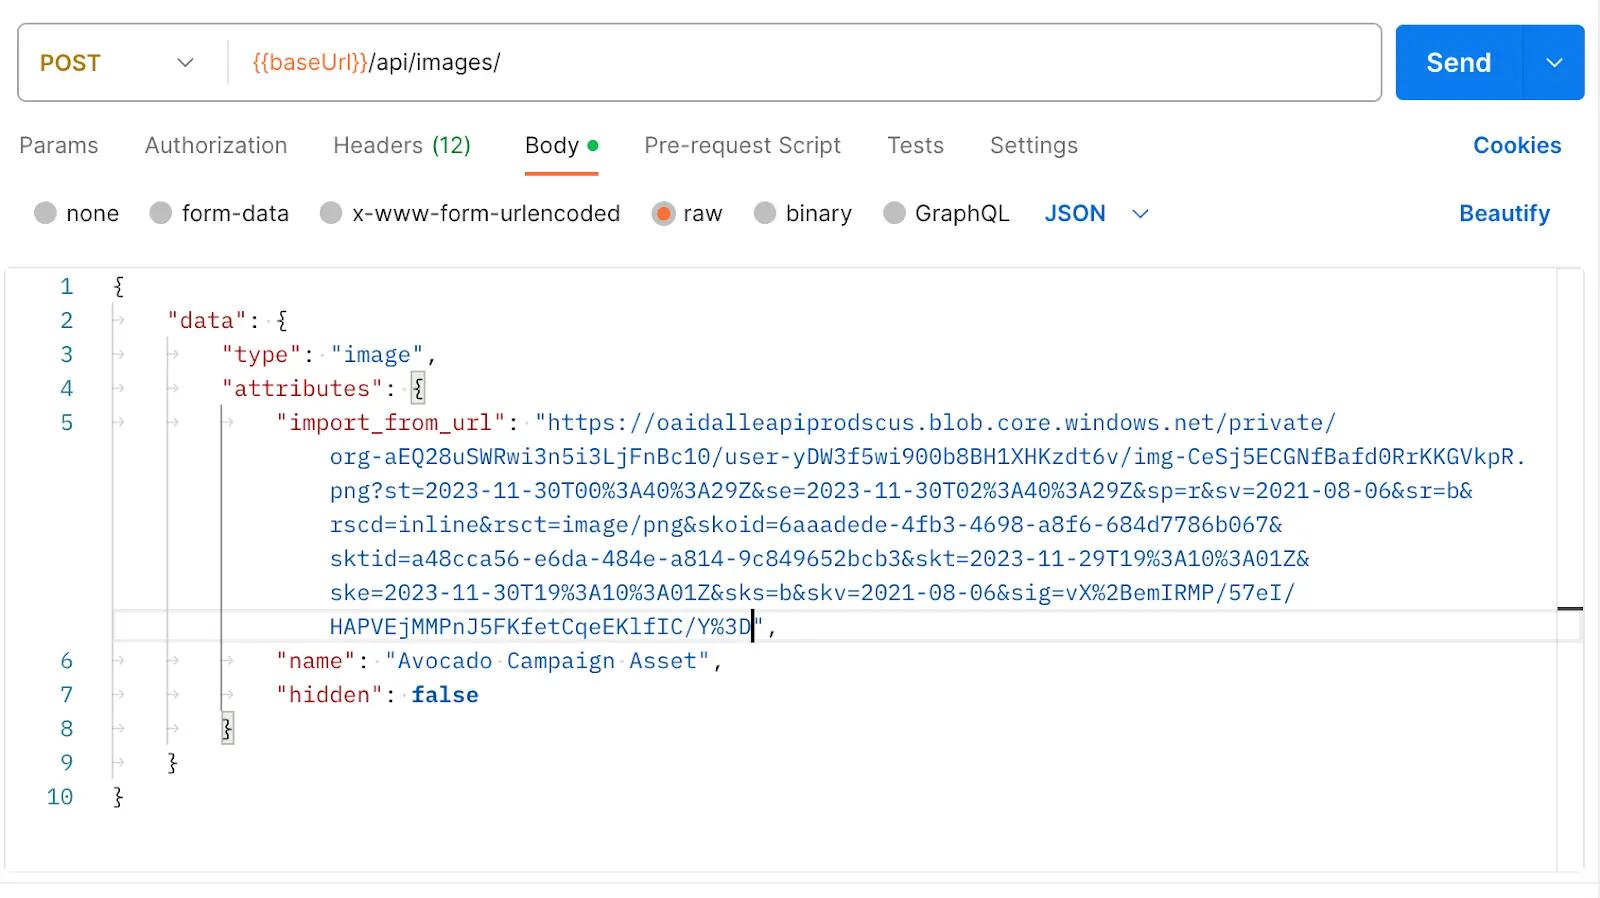
Here is an example Python function using Klaviyo’s Python SDK:
import os
from klaviyo_api import KlaviyoAPI

def klaviyo_create_image(image_src, image_name):
    klaviyo = KlaviyoAPI(os.getenv("KLAVIYO_API_KEY"), max_delay=60, max_retries=3, test_host=None)
    klaviyo_response =  klaviyo.Images.upload_image_from_url({
        "data": {
            "type": "image",
            "attributes": {
                "import_from_url": image_url,
                "name": image_name,
       "hidden": False
             }
       }
   })

   return klaviyo_response
Putting the Dall-E and Klaviyo APIs together
Here’s a Napkin function that uses Dall-E and Klaviyo APIs together. Click Add to your Functions to clone the function to your account.
When you clone the function, you should see the code appear in your Napkin account, and any necessary dependencies will also be installed.
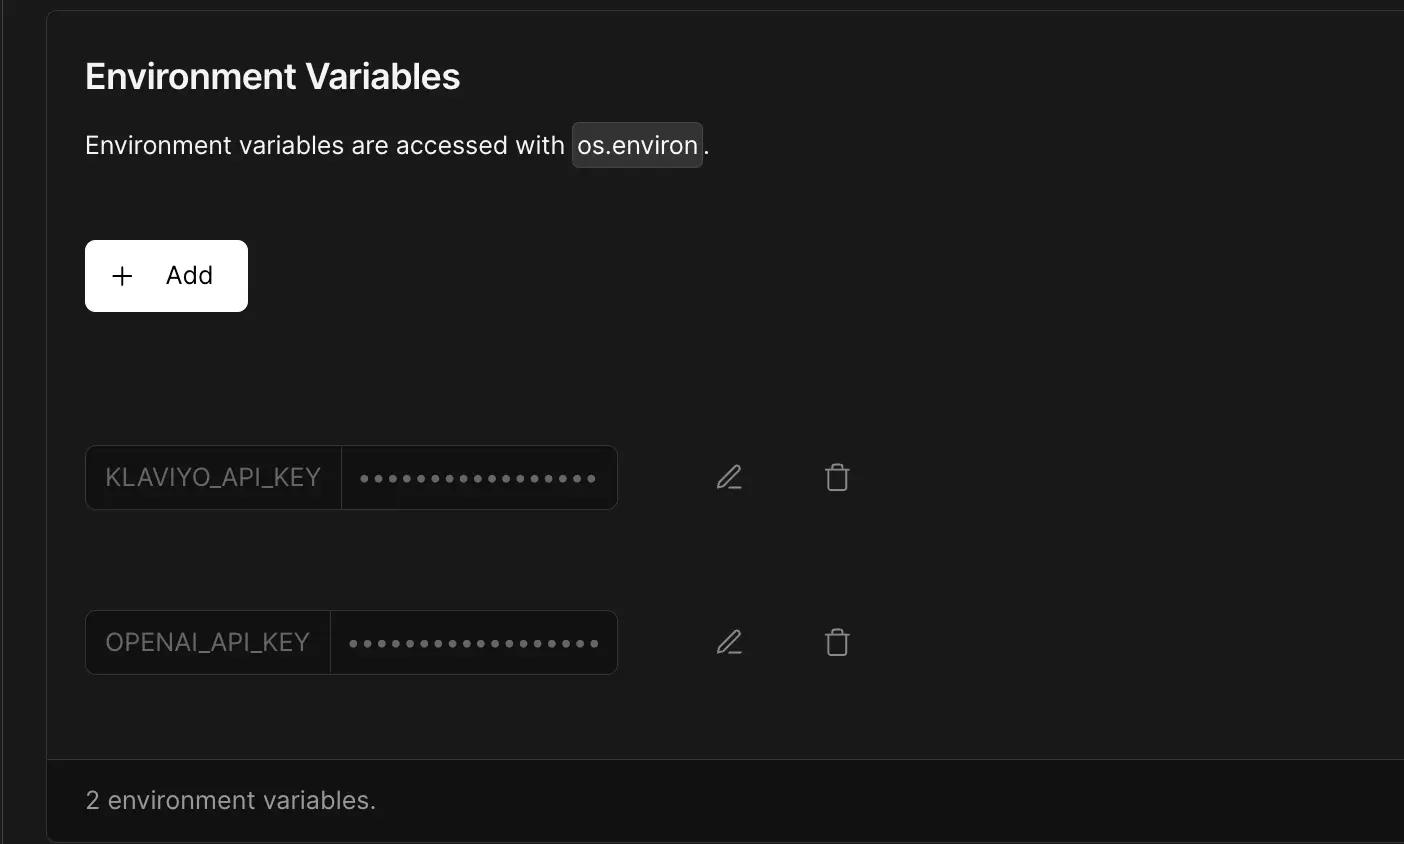
We now need to configure some environment variables. These details are required so that the function knows which OpenAI account to use for generating images and which Klaviyo account to send the images to.
To add them, navigate to the Other tab. Next scroll down to Environment Variables.
You will need to add the following variables in order to use the Napkin function:
- KLAVIYO_API_KEY: This is the Private API Key for your Klaviyo account.
- OPENAI_API_KEY: This is the API key for your OpenAI account.
Then, you can run the function using the default variables included in the function. Or, you can make a POST request to the Napkin URL with a payload like the one below, replacing the prompt, size, and number of variants as you wish.
{
  "prompt": "an avocado, in kawaii art style",
  "count": 1,
  "size": "1024x1024",
  "name": "cute avocado photo"
}
Building your campaign with your AI-generated image
Now that you’ve created an image for your cute avocado image using AI, it’s time to actually use it in a campaign. Create a campaign within your Klaviyo account, add an SMS message (or email), and drop in your avocado image (or whatever image) ready to go.
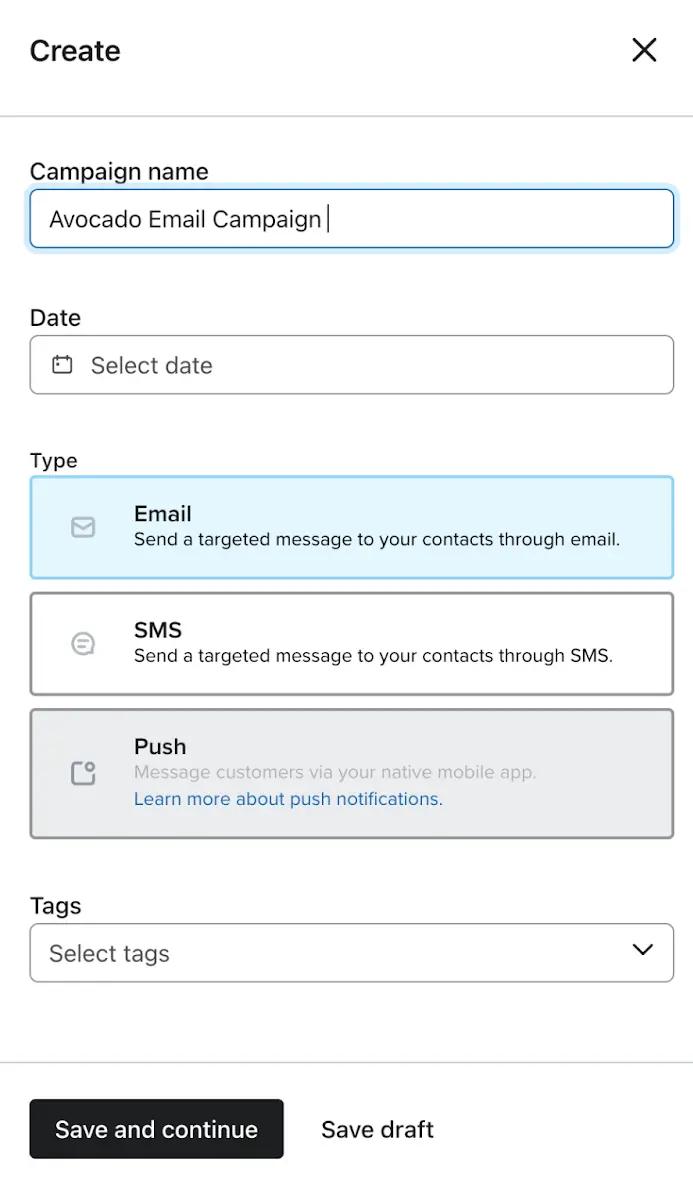
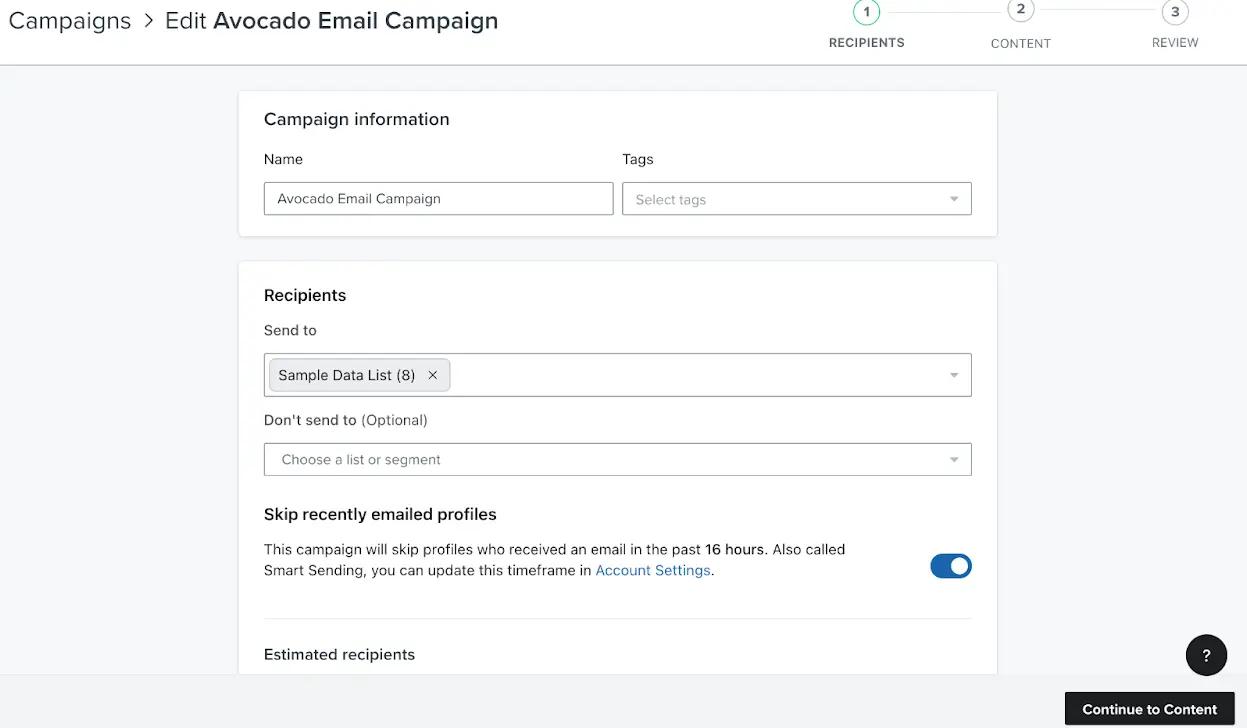
Navigate to Campaigns, click Create Campaign, and provide campaign details like the Avocado Email Campaign below:
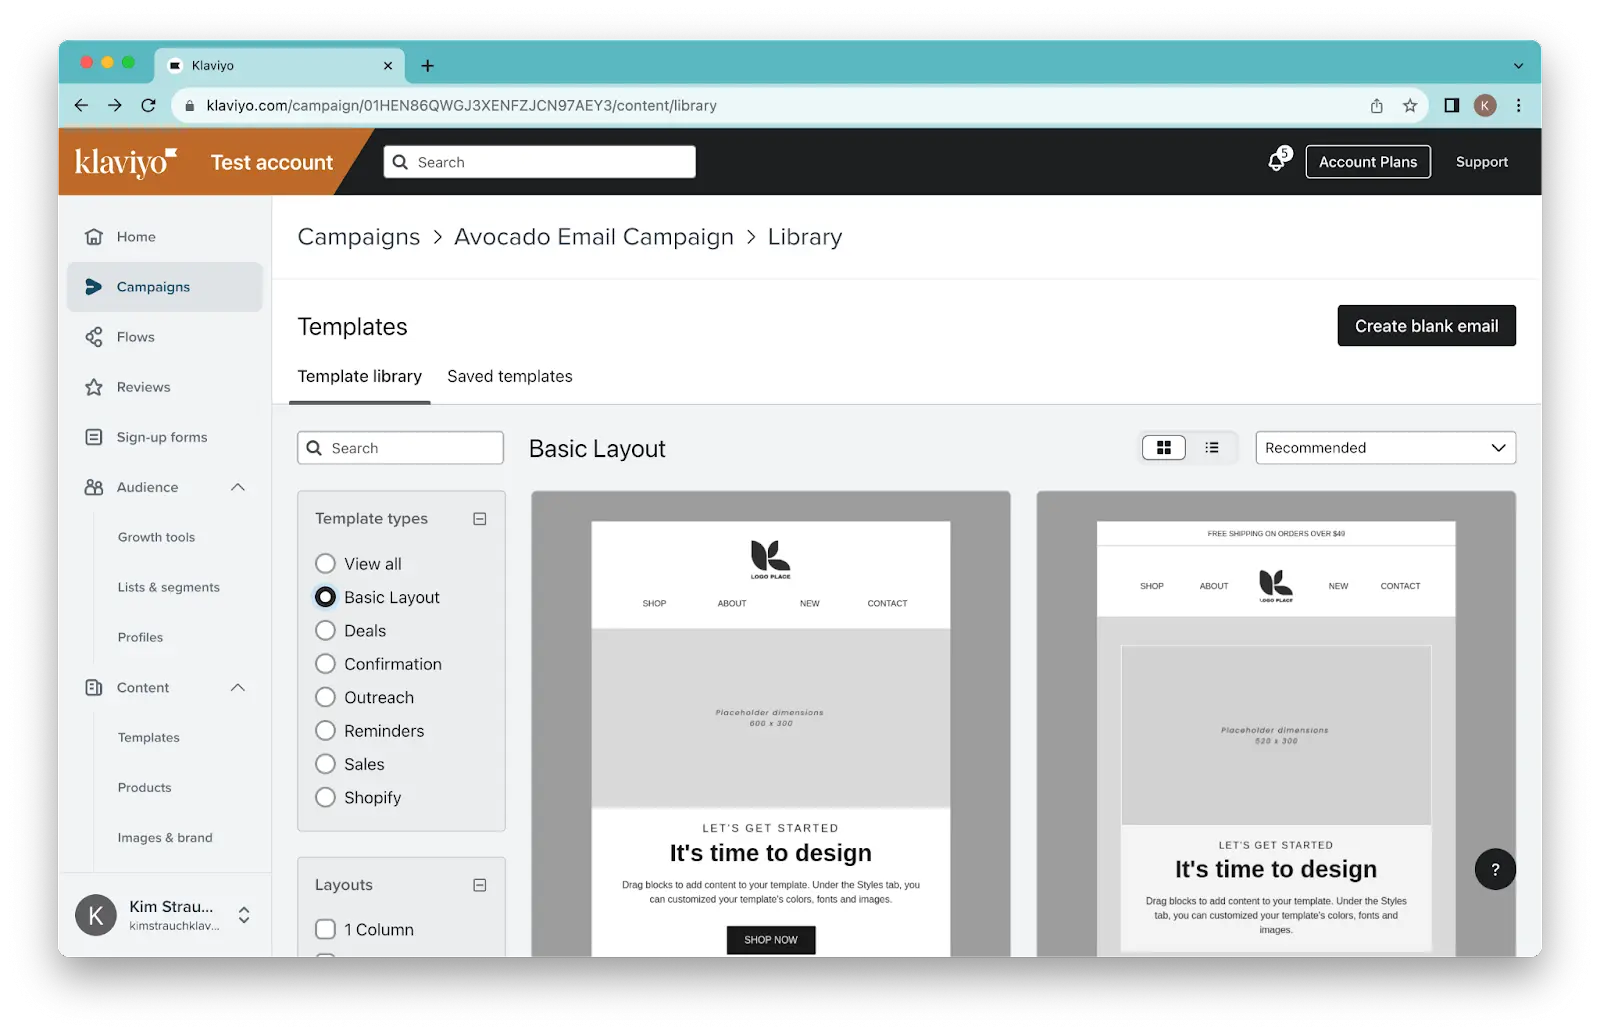
Choose a template.
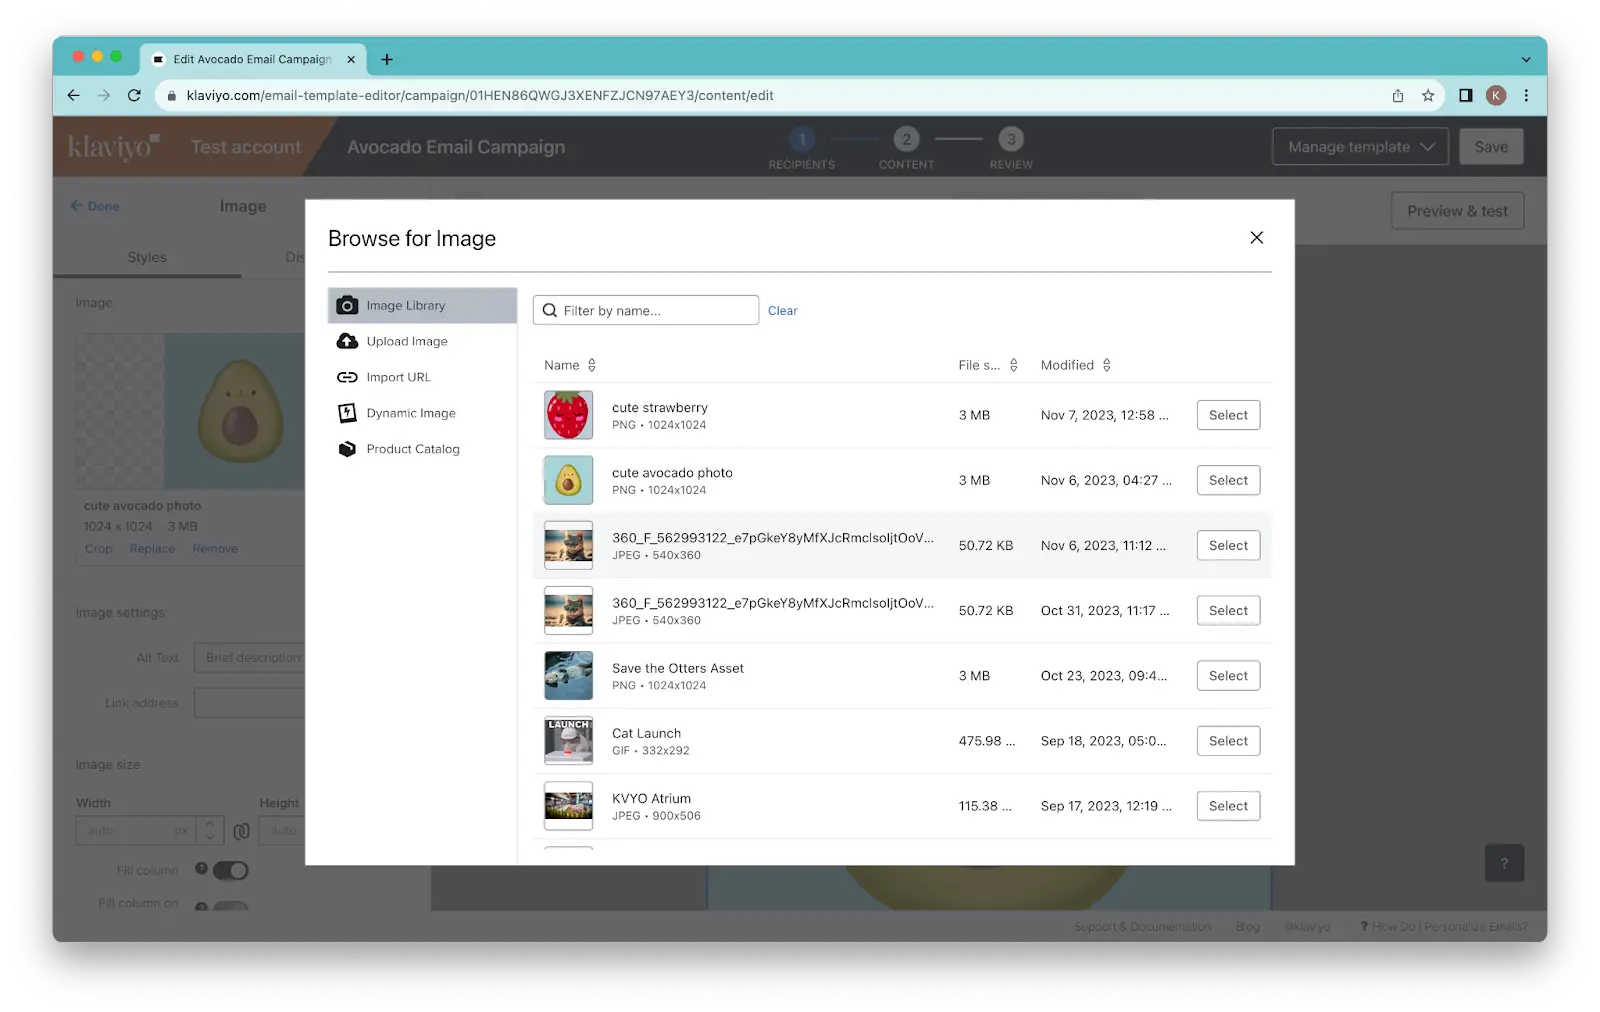
Add your image!

Profit!

